
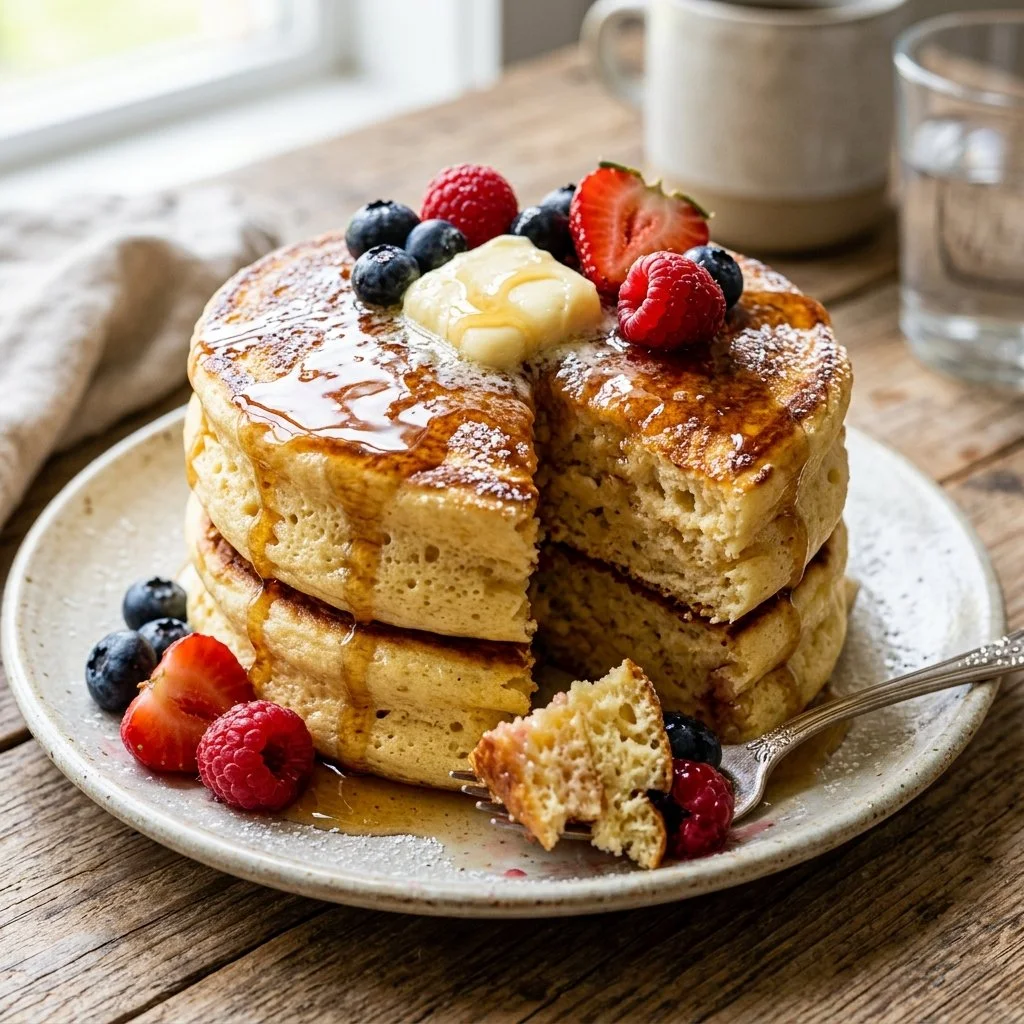
There’s something truly special about the fluffiness of Japanese pancakes that makes even the simplest breakfast feel like a luxurious treat. I remember the first time I laid eyes on these cloud-like delights on my Instagram feed. Those towering stacks of pancakes seemed to defy gravity; fluffy, soft, and oh-so-perfectly round. I decided to give them a try and, with a pinch of excitement and a dash of patience, discovered how to create these dream pancakes in the comfort of my kitchen. Trust me, this is one journey you want to embark on, as it will fill your home with warmth and sweetness—one pancake at a time!
Recipe Timing
- Prep Duration: 10 minutes
- Active Cooking: 15 minutes
- Total Duration: 25 minutes
- Portion Size: Serves 2-3
- Complexity: Simple
Nutritional Recipe
- Calories per portion: Approximately 320 calories
- Protein: 8g per serving
- Carbs: 52g per serving
- Fats: 11g per serving
- Fiber: 1g per serving
- Sugars: 8g per serving
- Sodium: 300mg per serving
Why You’ll Love This Fluffy Japanese Pancakes
These pancakes are not just breakfast food—they’re an experience! With their incredibly soft and airy texture, each bite feels like a light hug, making breakfast a delight rather than a chore. Whether you’re looking for a comforting weekend indulgence or a fun brunch idea to impress friends, Fluffy Japanese Pancakes are the way to go. Plus, customization is key—stack them high with fresh fruit, drizzles of maple syrup, or a dusting of powdered sugar, and let your creativity shine!
The Complete Cooking Journey
The process of making these pancakes is uncomplicated yet rewarding. As you pour in your ingredients and watch them transform into a fluffy batter, it’s hard not to feel a sense of accomplishment. Cooking them on low heat allows for that signature fluffy rise without burning, making it an art form of patience and finesse. Plus, you’ll create a cozy aroma that wafts through your home—a perfect way to start your day or brighten up an afternoon.
Ingredients:
- 1 cup all-purpose flour
- 2 tablespoons sugar
- 1 teaspoon baking powder
- 1/2 teaspoon baking soda
- 1/4 teaspoon salt
- 1/2 cup milk
- 1 egg
- 1 tablespoon vegetable oil
- 1 teaspoon vanilla extract
- Butter for cooking
Method:
Step 1: Combine the Dry Ingredients
In a bowl, mix together the flour, sugar, baking powder, baking soda, and salt. This is your dry base that will support those fluffy pancakes.
Step 2: Whisk the Wet Mixture
In another bowl, whisk the milk, egg, vegetable oil, and vanilla extract together. This fragrant mixture will add moisture and flavor to your pancakes.
Step 3: Combine Wet and Dry Ingredients
Gradually add the wet ingredients to the dry ingredients and mix until just combined. Don’t overmix; a few lumps are perfectly fine!
Step 4: Heat the Skillet
Heat a non-stick skillet over low heat and add a little butter. The lower temperature is crucial for achieving that desired fluffiness without burning.
Step 5: Pour and Cover
Pour a ladle of batter onto the skillet and cover with a lid. This brief moment of patience allows them to steam and rise beautifully.
Step 6: Watch for Bubbles
Cook for 4-5 minutes until bubbles form on the surface. When you start to see those little bubbles, you know it’s time to flip!
Step 7: Brown the Other Side
Flip and cook for another 4-5 minutes until golden brown. You’ll want them to be perfectly browned and fluffy, making for a visually appealing stack.
Serving Suggestions & Pairings
These pancakes shine best when stacked high and adorned. Top them with seasonal fruit like sliced strawberries or blueberries, a dollop of whipped cream, or a drizzle of honey or maple syrup. For a twist, consider a spoonful of matcha powder mixed into the batter, or serve alongside some crispy bacon for a sweet and savory pairing.
Storage & Leftovers Guide
Leftover pancakes are best stored in an airtight container in the fridge for up to 3 days. To reheat, simply pop them in the microwave for a few seconds or give them a quick toast in a skillet. Pancakes can also be frozen for up to a month. To do this, layer parchment paper between them before freezing, so they don’t stick together.
Kitchen Wisdom & Success Tips
- Low and Slow: Cooking on low heat is key to achieving fluffiness without burning.
- Don’t Overmix: Keep some lumps in the batter to maintain fluffiness.
- Use a Lid: Covering the pan while cooking helps create steam, enhancing the fluffiness.
- Be Patient: Good things come to those who wait—allow them to puff up before flipping!
Flavor Variations & Adaptations
- Chocolate chip: Stir in mini chocolate chips for a sweet twist.
- Cocoa powder: Mix in a small amount of cocoa for a chocolatey version.
- Citrus zest: A little lemon or orange zest can add a refreshing flavor.
- Nutty: Incorporate ground nuts or almond flour for a different texture.
Reader Questions & Solutions
-
Q: Why didn’t my pancakes rise?
A: Ensure your baking powder and baking soda are fresh, as expired leaveners won’t provide the necessary lift. -
Q: Can I substitute dairy milk?
A: Yes! Almond, soy, or oat milk will work well as alternatives. -
Q: How can I make them gluten-free?
A: Substitute the all-purpose flour with a gluten-free flour blend. -
Q: What if my cakes are browning too fast?
A: Lower the heat further or use a thicker pan to distribute heat more evenly. -
Q: Can I double the recipe?
A: Absolutely! Just keep the ratio the same, but be mindful of cooking time as larger batches may require longer on the stove.
Wrapping Up
There’s something magical about creating your very own fluffy Japanese pancakes. The process is simple, and the results are consistently delightful! So gather your ingredients, pour in the love, and watch as every pancake transforms into a fluffy masterpiece. Whether you are serving them to family, enjoying them solo, or sharing them with friends, these pancakes are sure to bring smiles all around. Happy cooking, and may your kitchen always smell of sweet delight!